Group to Enterprise Migration
A detailed description of the Group to Enterprise Migration feature and it's procedure can be found under the Alpaca guides.
The Group to Enterprise Migration location allows a Group that is currently part of a Service Provider to be migrated to a newly created Enterprise. During the migration the Group can be split into multiple Groups. This is handy if a Group is over-populated.
Process
### Step 1

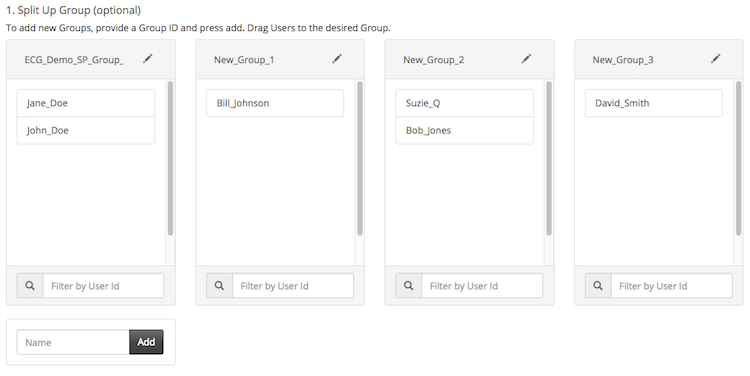
- Step 1 is an optional step. If you do not wish to split the Group up into multiple Groups during the migration, this step can be omitted.
- Otherwise, user the Add button to add new Groups. Just provide an ID for the Group to be created. this ID must be unique to the system. This can be done as many times as desired.
- Once you have added the Group/s, you can drag Users from panel to panel to split them up as desired. The filter box (located at the bottom of each Group panel) can be used to filter the Users in the current panel to allow for quick searching.
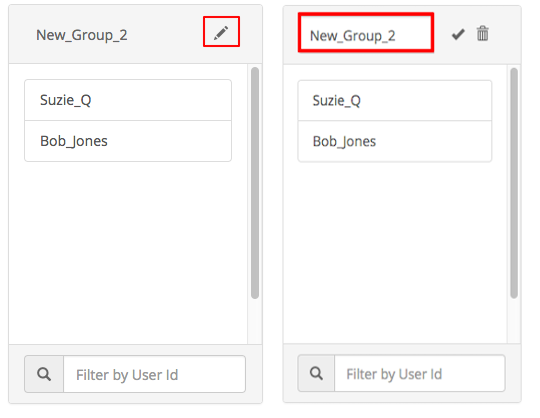
- To edit or remove a Group panel, click the pencil icon in the top right corner of the panel you wish to modify. You can now modify the ID or delete the panel. If an ID change is desired, modify the name and select the checkmark icon to save the changes.

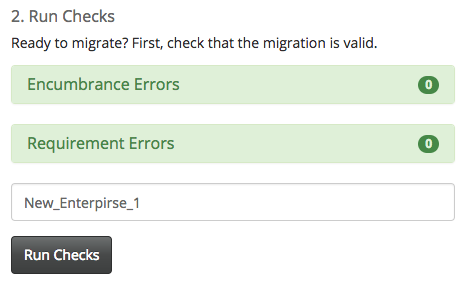
### Step 2 - Once you are done arranging Users, provide an ID for the Enterprise that will be created. This ID must be unique. - Once you have provided anID, the Run Checks button will become available. Click this to run checks. - The results of the checks will now be displayed. If no errors were found, the Encumbrance and Requirement panels will be green. If errors were found, the panels will be read and will display the errors. - These checks must pass for the migration to be valid.

### Step 3 - Once all checks have passed, the Migrate button will become available. When you are ready to migrate, click this button and the migration will begin. - Once the migration has begun, it's status can be monitored in the Status Log panel located at the bottom of the page. - The migration can also be monitored on the Tasks page. See Tasks Guide.